

INSPIRATION

As soon as I seen this bookshelf...
I know I wanted it!!
This one is made from metal and is $2800

Nurseryworks recreated it using MDF for $850
Well neither were in my budget so I did my best to try and recreate my own version with some left over lumber.
Here's my tutorial:
I used 3 2x6's for the center trunk cut to 7ft
and different sized 1x6 pieces for the
6 shelves between 2ft and 4 ft each
the trimmed off pieces are the branches.
Gorilla glue and a few nails and screws.
All items I had leftover from other projects
making this bookshelf FREE!

First I laid everything out to get an idea of what I wanted.
I used 3 2x6's down the middle for a depth of 4 1/2"
NOTE:
A 2x6 is about 1 1/2" deep
A 1x6 is about 5 1/2" wide
I have no idea why they aren't true to size!
I trimmed all my shelves to 4 1/2" to fit
my 3 2x6's (4 1/2 ")
If you want wider shelves use 1x8's and more 2x6's

I marked each shelf at 4 1/2 inches
So they will be flush with my 2x6's...
One side of the shelf will be against the wall
so only need to cut one edge...
I marked a wavy line with sharpie...
just to try and give the board more shape like a branch...

Then I used this trusty jig saw to cut the edges of my shelves.

See how one will be the shelf and the other the decorative branch:-)

I laid everything out again and made a diagram so I could remember how to put if all back together

I numbered the wall edge side and painted.
This tree bookshelf is going in my kitchen to hold cookbooks
I painted it the same color as my back kitchen wall.

It's always nice to have a good helper!

I (ok the hubby) did the same thing on each side of the 2x6's.
Mark your first one then use it as a guide for the others.
I should have marked these a little slender towards the top
to look more like my inspiration.

The bottom one is notched out to fit against the baseboard

All 3 are screwed together with a 4" screw
at the top, middle and bottom.
You can use a sander to smooth all edges...but I liked the rough edges.....
it is a tree after all:=)

Fits perfectly against the wall.

Find the stud in the wall
I used one screw at the very top to secure to the wall.
I left unpainted because I wasn't even sure if I was gonna like it and because I wasn't sure if I wanted the
trunk unpainted, brown or green.

And now to attach everything.....
My plan was to use brackets for the shelves but the only ones I had on hand were just to big and looked awful...
So I found some Gorilla Glue.....this stuff is awesome!!
It foams to fill in any gaps and really has an amazing grip!
I attached each shelf with glue and a couple of finishing nails.
I used the brackets just to hold the glued shelves overnight.

I used my diagram somewhat but kinda just
went with what looked best.

I just tried to create a big circle with the branches.
The branches are just attached with finishing nails in case I wanted to make some changes.
I let the shelves dry overnight then
removed the unsightly brackets and painted it.

Ready to hold all my cookbooks...
I thought about adding pegs and hanging some recipe cards...
and I think I might add a quote down the center....
Maybe 'Bless this Meal'
I'll take any suggestions PLEASE:-)
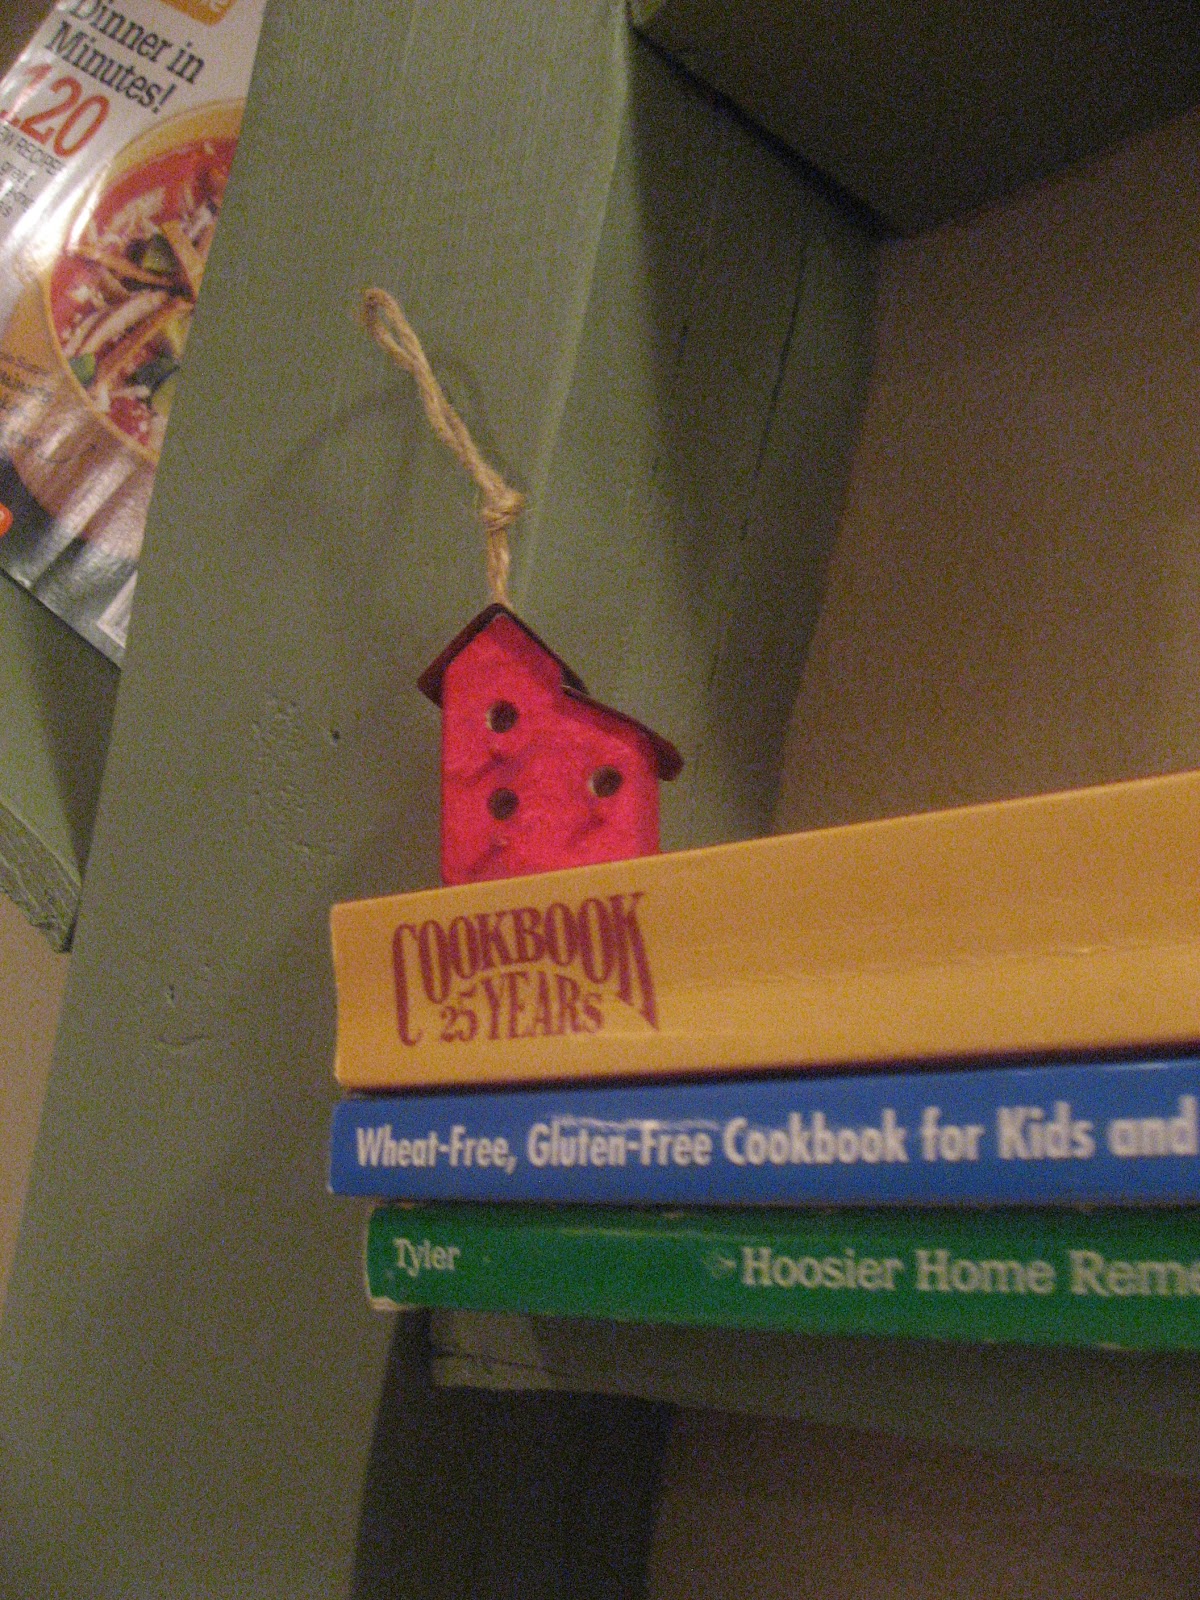
I found the cutest little bird house at the thrift store!


I am entering this project over at the

Check out all the places I party!

Wow Michel that is just superb! If you don't win the first prize (again!) with this project, I will be so surprised - it's wonderful. And you "saved" $2800 making it from spare timber... Perhaps you should make some more and sell them!
ReplyDeleteIt's a beautiful tree-shelf, though I am a bit puzzled how it will stay together with gorilla glue... which bits are glued and which are fixed with screws? Maybe you could clarify that in your project notes? (or maybe I'm just dense and it really is all held together with glue!).
You have done an excellent job with this; I'm truely impressed.
ReplyDeletewww.licklepickle.blogspot.com
That is awesome! Love it! It would look amazing in a kid's bedroom, too. That is a true DIY project!
ReplyDeleteI'm here via Tip Junkie.
this is a really cool project, turned out great. thanks for sharing at my party!
ReplyDeleteUnbelievable! I love this! Stopping by from DIY By Design
ReplyDeleteWhat a really cool project. It turned out amazing. Thanks so much for linking up to the party.
ReplyDeleteGirl this is AMAZING!! I wish I had a prize or award I could give you, cause you deserve one!! Love it:)
ReplyDeleteThis is so amazing love how it turned out!
ReplyDeleteabranconier.blogspot.com
can I just say OMG - that turned out soooo good!! I LOVe the expensive inspired projects that we can make for FREE!! FABULOUS!
ReplyDeleteUnreal! I am jealous of your talent in woodworking and that you can keep all your cookbooks displayed like that in your kitchen! You did an outstanding job! BRAVO!!!
ReplyDeleteI followed the link from My Backyard Eden.
~Rachel @ cookscleansplayswithpaper.blogspot.com
Hi! I found you on Wandering Wednesday and am now following. I love this book case you made...beautiful!
ReplyDeleteJan at Jewelry4Change
http://www.jewelry4change.blogspot.com
That's awesome. I came from Wandering Wednesday. Love your blog and now your newest follower! Wander by sometime if you'd like.
ReplyDeletewww.acreativeprincess.blogspot.com
Great job! I love the bookshelf.
ReplyDeleteWOW! Great job!
ReplyDeleteI am a new follower from wandering wednesdays. Would love to have you follow back!
WOW! Great job!
ReplyDeleteI am a new follower from wandering wednesdays. Would love to have you follow back!
WOW! Great job!
ReplyDeleteI am a new follower from wandering wednesdays. Would love to have you follow back!
This is completely awesome!
ReplyDeletei have loved that shelf since I saw it! love your version...pretty sure I love everything you have done!!!!! I'm going to link this up at my facebook!!!
ReplyDeleteI just about died when I saw how precious this is. I am totally sending my hubby this link. He loves to build and he could do this so easy! Thank you so much for sharing this! I would love to put this in my office! Or in the playroom. I LOVE IT!
ReplyDeleteHeather
this is really a great project for any room in the house!
ReplyDeleteThis is fantastic! I saw the $2800 version in a magazine recently and was drooling over it, wondering if my hubby could recreate it. Now we have your instructions! Very nice work!
ReplyDeleteThat is so clever! You did an excellent job.
ReplyDeleteThis is amazing!!! I love it!!!
ReplyDeleteI have that EXACT picture I pulled out of a magazine to try to recreate it too! I love it and you did a fabulous job!
ReplyDeleteI found your blog through a girl and her glue gun and will now be following you as well! I love all your ideas for updating your home. My husband and I just bought our first home last summer and I have been trying to find some inexpensive ways to spice it up. You have really helped me get inspired.
ReplyDeleteOmg I love this, I am making on very very soon!
ReplyDeleteThis is adorable and very creative!! Thanks for auditioning for OMTWI! :)
ReplyDeleteWhat a fantastic job you did! This turned out perfect! I love it.
ReplyDeletehttp://itsybitsypaper.blogspot.com
Did this really cost under $20?!?! What?! This is SOOO cute! You did a great job!!
ReplyDeleteThanks so much for linking to "20 Below Thursday"! :)
This is wonderful. I just started following your blog. Saw you on the link party for $20 or less crafts. I want to invite you to enter my give away I have going on at my blog.
ReplyDeletehttp://bacontimewiththehungryhypo.blogspot.com/2011/03/big-give-away.html Not to many people have entered yet so chances are good and it is a very nice give away.
This is amazing!!!!! I am visiting from Someday Crafts and I am a new follower!
ReplyDeleteHave a fantastic day!
Michelle
www.delicateconstruction.blogspot.com
Cool. I'm impressed. Me and power tools don't mix.
ReplyDeletemegan
craftycpa.blogspot.com
too cute!
ReplyDeleteLove this!!! What a great way to get all those cook books out where you can see them so you remember to use them!!!
ReplyDeleteLooks amazing I love it! Way to go!!! Very creative, I actually like it more than the expensive ones!
ReplyDeleteCrystal
Oh my! How cute is that??? So cool and creative!
ReplyDeleteOh my geez, that is amazing!! Itts even extra awesome that it was free to put together! Visiting from Somewhat Simple.
ReplyDeleteThat is AMAZING!
ReplyDeleteAh, I had the same original pic saved on my computer! I've been wanting to tackle this as well. Yours turned out fab-tab! Thanks for the eye candy and good luck!
ReplyDeletewhat a cool idea! it turned out great!
ReplyDeleteThis is absolutely incredible! I would've looked at those pricy tree bookshelves and thought "no way could I make that myself!" Awesome Job! What a wonderful idea for a nursery! Looks great in your kitchen!
ReplyDeleteI just read your Love Story and it is so inspiring and full of hope! I love witnessing God's sovereignty through different people's stories...so neat! He really does love us!
ReplyDeleteThis is freaking amazing! You definitely need your own TV show on TLC!
ReplyDeletehttp://thriftyandshameless.blogspot.com
So creative and you did a excellent job at making it look the metal one.
ReplyDeleteI need someone to come over here and close my jaw, that bookshelf is absolutely stunning. I've see similar ones somewhere else that do not have nearly the same price tag as what it cost you. Hope you win the contest!
ReplyDelete-napualaniscloset.blogspot.com
Wonderful tutorial! Super cute idea :) Thanks SO much for linking up to Thrilling Thursday @ Paisley Passions. I hope you stop by again soon :)
ReplyDelete~Lori @ Paisley Passions
LOVE IT! You are one talented lady! That is fantastic idea! Thanks for linking up!
ReplyDeletePS- Love your new blog design! :)
This is really cute!
ReplyDeleteYep! Where there's a will there's a way. And outrageous retail prices are great motivators for us DIYers. lol
ReplyDeleteYour shelf is just too cute! Thanks for linking it to the party. It would be great to have you link to "Funny Faux Pas Follies," as well. Get the details by clicking the party button in my sidebar.
Liz @ the Brambleberry Cottage
http://thebrambleberrycottage.blogspot.com/
Ummm...my mouth is seriously hanging wide open! This is so awesome and I just can't get over it! You are so talented and I'm just so happy that we have gotten to see so many of your fabulous creations. Thank you so much for sharing this at Inspiration Friday this week!
ReplyDeleteVanessa
P.S. My sister and I had a whole conversation about how much we love everything you do! :-)
You are AWESOME! Awesome I tell you! That project is just amazing! I would've looked at that project and thought, "impossible!" You looked at it and thought, "I can do that!" Really, it turned out wonderful. GREAT job!
ReplyDeleteWOW! You are stinking amazing! That is AWESOME!
ReplyDeleteThanks for linking up to Making It With Allie! I can't wait to see what you have for next week!
AllieMakes.Blogspot.com
Oh my goodness- A-MAZING! Love, love, love this project. Thanks for the lovely tutorial, too!
ReplyDeleteThis would be so wonderful in a child's room. Great job!!!!
ReplyDeleteOMG this is so awesome! Love love love it!!
ReplyDeleteThat rocks! That is, by far, the coolest bookshelf I have ever seen. I am featuring this at somedaycrafts.blogspot.com.
ReplyDeleteI'm new to your blog and totally blown away by your creativity. This is so cute (as is your little helper). Thanks for the fabulous inspiration and tips for saving some serious cash!
ReplyDeleteLove this tree!! It is so fun. I would love to do this at our school library. Thanks for sharing!
ReplyDeleteI love love LOVE this! Will you please come and decorate my house for me? :)
ReplyDeleteHOLY SMOKES! This is one of the most INCREDIBLE projects I've seen in a while. You are just amazing. This is over the moon. Thanks so much for posting this at my VIP party at Designer Garden today!
ReplyDeleteXX
Sommer
That is SO CUTE! I can totally picture something like that in a nursery too. Or kids bedroom. Very neat way to display favorite books!
ReplyDeleteThis is such a great idea! I love that it was free too!
ReplyDeleteI am a new follower from Chic on a Shoestring, I would love if you could stop by www.mooseandtater.com
Wow, what a great knockoff and fun idea.
ReplyDeletegorgeous!
ReplyDeletesuper effect!
happy weekend!
Rosa
This is just great! We have been looking for a creative book shelf for our kids.
ReplyDeleteWhat a great idea! Show that jigsaw who's boss. :)
ReplyDeleteoh my goodness this is the coolest thing ever! thanks so much for sharing your tutorial!!
ReplyDelete=)Tiffany
Breakfast at Tiffany's
seriously?! you rock! i think it actually looks better than your inspiration picture! not even kidding! you did an amazing job!!
ReplyDeleteThis is really awesome!! When we own a house someday, I'd love to be able to do something like this!! I love the colors, and the whole feel of it!!
ReplyDeletehttp://dojocrafting.blogspot.com
This is so cool! It can be very versatile, too. You can easily use it for themed decorations like birds and birdhouses or with photos for a family tree. Great job!
ReplyDeleteI featured this project today on my blog...thanks for linking it up! Come grab a "featured" button...you deserve it! :)
ReplyDeleteSo cool. Great job!
ReplyDeleteThat is super cool idea!! Thanks for sharing.
ReplyDeleteI am a new follower.
Hope you come by to visit.
Cheers!
Jen
Oh WOW!! this is such an amazing project and looks fabulous! You really are very talented!! I'm a new follower so I can stop by more often for more inspiration.
ReplyDeleteI would love if you came over and linked this project to my weekly Round Tuit party at:
http://jembellish.blogspot.com/
Have a great week!
Jill @ Creating my way to Success
a killer knock-off! great hands there...i'm in awe! keep doin DIY.
ReplyDeletei am a follower here:)
A totally unique and creative tree!
ReplyDeleteOkay, I just love this! So creative and way to make it affordable! I am going to have to try and make one of these for my house! Thanks for the tips and for sharing this at Fantastic Friday. I hope that you will join us again this week,
ReplyDeleteAmazing! I'll be featuring you as a Friday Fav- come grab a button & party with us on Friday:)
ReplyDeleteI love this Michell!! What a fun way to display books - it's just so cute!
ReplyDeleteThanks so much for linking up to Think Pink Sundays!! (and for the link back!!! ) :)
This is amazing! I featured it on Hoo's got talent! Thanks for linking up to the party!
ReplyDeleteomg Michelle this is amazing it look so daunting to me.
ReplyDeletewould luv for you to add it to our linking party this week.
http://www.passionatelyartistic.com/2011/03/orange-blossoms-with-linking-party.html
Thanks
Maggie
You did a terrific job on this. I love that you showed your inspiration piece too. I would have so much fun just arranging my books on this. Such a unique project and that is something I am always drawn to.
ReplyDeleteThanks for sharing this on Motivated Monday at BeColorful.
Pam
Oh my - you are one amazing lady! LOVE, LOVE, LOVE this idea!
ReplyDeleteare you going to creative estates?
Holly
Let me be the 200 person to tell you this is awesome. Amazing . True creative!! I love it.
ReplyDeleteHi, Michell I am a new follower on your blog. I love this Tree Bookshelf, how inventive out of free wood you had. Love it. Very interesting conversation piece it must be also when you have guests over. Great job.
ReplyDeletewww.creativetizzy.blogspot.com
Come visit me!
i've been admiring this tree in photos...thank you for the tutuorial. now for a place to put it....!
ReplyDeleteWhoa, that is so impressive and resourceful. $2800??! Yowza. Way to go with your creativity. Looks awesome!
ReplyDeleteYou did a fantastic job!!! I can't believe you figured out how to recreate $2,800 for FREE! Great idea!
ReplyDeleteToo Cute!!! www.DesignBuildLove.co
ReplyDeleteThis is my favorite project ever! My blog is "A Sheltering Tree" so tree speaks to me and books are my biggest love.
ReplyDeleteDrooling on my keyboard,
Pamela
totally amazing Michell!!! you did a great job hun!
ReplyDeleteThis is amazing! Even if it was just the tree, it would be pretty cool, but then the fact that it's 3-D and has tons of visual interest and lets you store books (so you get to decorate with things you have that take up space) is just AMAZING! : )
ReplyDeleteThis is really neat!
ReplyDeleteGreat job on the bookshelf! I saw that same one recently and told my husband that we have to do something like that in the future. Love it!
ReplyDeleteThis is an amazing idea you have! I'm so inspired. I've gone through lots of ideas, and you are a creative genius. Thank you so so so so much for sharing.
ReplyDeleteP.s. I'm wondering though...how can that glue hold up books?
Hi Michell! What an awesome knock off! I've featured this post on Copy Cat Crafts today, you can view it here
ReplyDeletehttp://www.copycatcrafts.com/how-to-make-an-amazing-tree-bookshelf/
We'd love it if you'd like to display a featured button! You can grab your button on the right hand side of your post. Thanks!
That is one amazing project! I'm so impressed ...
ReplyDeleteOh, and stopping by from Not Just A Housewife ...
... and is it just me, but why aren't other contest participants visiting each other? Really? You have 100 comments ... it's definitely a click worthy project. Just saying...
I like your creative idea,have you some creative ideas on plastic cards?
ReplyDeleteFundraising Discount Cards
Gift Card Printing
Hank Hendricks
it's very interesting ideas to make a modern bookshelf , i will try to make it , thank you :)
ReplyDelete